
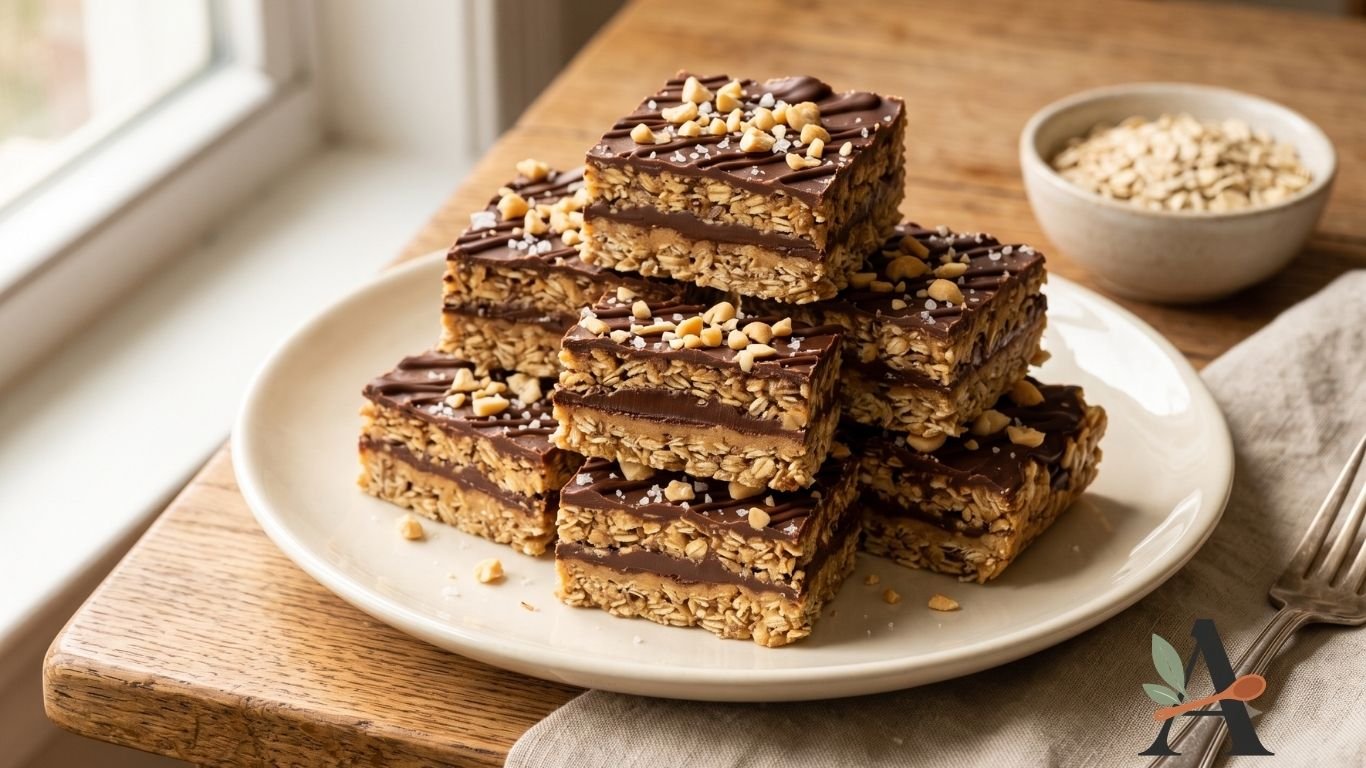
These no-bake chocolate oat bars have chewy, buttery oat layers surrounding a rich chocolate and peanut butter filling. They require no oven and are prepared using simple pantry ingredients.
The bars can be made ahead and refrigerated until firm, making them useful for parties, packed treats, Christmas dessert trays or an easy family sweet.
Cut the chilled tray into small squares because the combination of chocolate, butter and peanut butter creates a rich dessert.
Why You’ll Love These Chocolate Oat Bars
- No oven required.
- Chewy oat layers.
- Rich chocolate filling.
- Creamy peanut butter flavour.
- Made with simple ingredients.
- Easy to prepare ahead.
- Freezer-friendly.
- Convenient for parties.
- Simple to slice and serve.
- Easy to customise.
Ingredients You’ll Need
For the Oat Layers
- 1 cup unsalted butter.
- ½ cup packed light brown sugar.
- 1 teaspoon pure vanilla extract.
- ¼ teaspoon salt.
- 3 cups old-fashioned rolled oats.
For the Chocolate Filling
- 1½ cups semisweet chocolate chips.
- ¾ cup creamy peanut butter.
- Flaky salt, optional.
- Chopped roasted peanuts, optional.
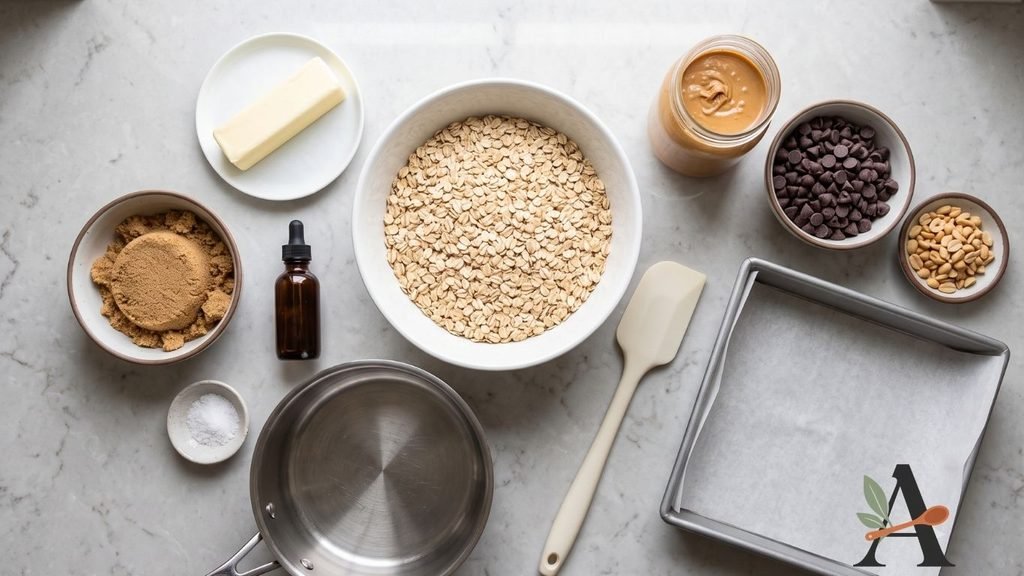
Ingredient Notes
Rolled oats: Old-fashioned rolled oats create the best chewy texture. Their larger flakes provide more structure than quick oats.
Butter: Butter binds the oat layers and provides a rich flavour.
Brown sugar: Adds sweetness, moisture and a caramel note.
Vanilla: Complements the oats, chocolate and peanut butter.
Chocolate chips: Semisweet chocolate balances the sweet oat mixture. Dark chocolate can be used for a less sweet result.
Peanut butter: Use creamy, shelf-stable peanut butter. Natural peanut butter may separate and create a softer filling.
Salt: Salt balances the sweetness and intensifies the chocolate flavour.
What Type of Oats Should You Use?
Use old-fashioned rolled oats for a chewy texture and distinct oat layers.
Quick oats absorb moisture more rapidly and may produce a softer, denser base.
Steel-cut oats are unsuitable because they remain too firm and require a different cooking method.
Avoid instant flavoured oatmeal because it contains additional sugar, flavourings and finely processed oats.
Are No-Bake Oat Bars Safe to Eat?
The oats in this recipe are cooked briefly with the hot butter and sugar mixture before being pressed into the pan.
Cook them for the full recommended time so they soften and the mixture binds properly.
Do not add raw flour. Untreated flour is not considered ready to eat and would require heat treatment.
How to Make No-Bake Chocolate Oat Bars
Step 1: Prepare the Pan
Lightly grease a 9-inch square pan.
Line it with parchment paper, leaving an overhang on two sides.
The parchment will make the chilled bars easier to remove.
Step 2: Melt the Butter
Place the butter in a large saucepan over medium-low heat.
Allow it to melt gently without browning.
Step 3: Add the Brown Sugar
Add the brown sugar and salt to the melted butter.
Stir continuously until the sugar is evenly incorporated.
Bring the mixture to a gentle simmer.
Step 4: Add the Oats
Stir the rolled oats into the butter mixture.
Cook over low-to-medium heat for approximately 4–5 minutes, stirring continuously.
The oats should become slightly softer and the mixture should look thick and cohesive.
Step 5: Add the Vanilla
Remove the saucepan from the heat.
Stir in the vanilla extract.
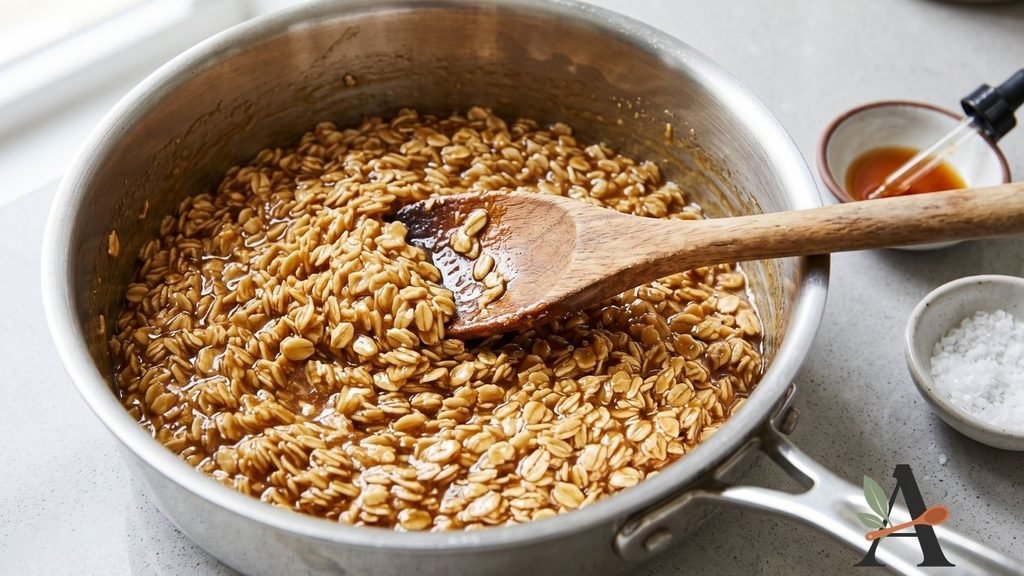
Step 6: Create the Oat Base
Transfer approximately half of the warm oat mixture to the prepared pan.
Spread it into an even layer.
Press it firmly with the back of a spoon or the bottom of a measuring cup.
Step 7: Melt the Chocolate and Peanut Butter
Place the chocolate chips and creamy peanut butter in a heatproof bowl.
Microwave in short intervals, stirring well after each one, until smooth.
Alternatively, melt them over a pan of barely simmering water.
Avoid overheating the chocolate.
Step 8: Add the Chocolate Filling
Pour most of the chocolate mixture over the oat base, reserving several tablespoons for decorating if desired.
Spread it evenly towards the edges.
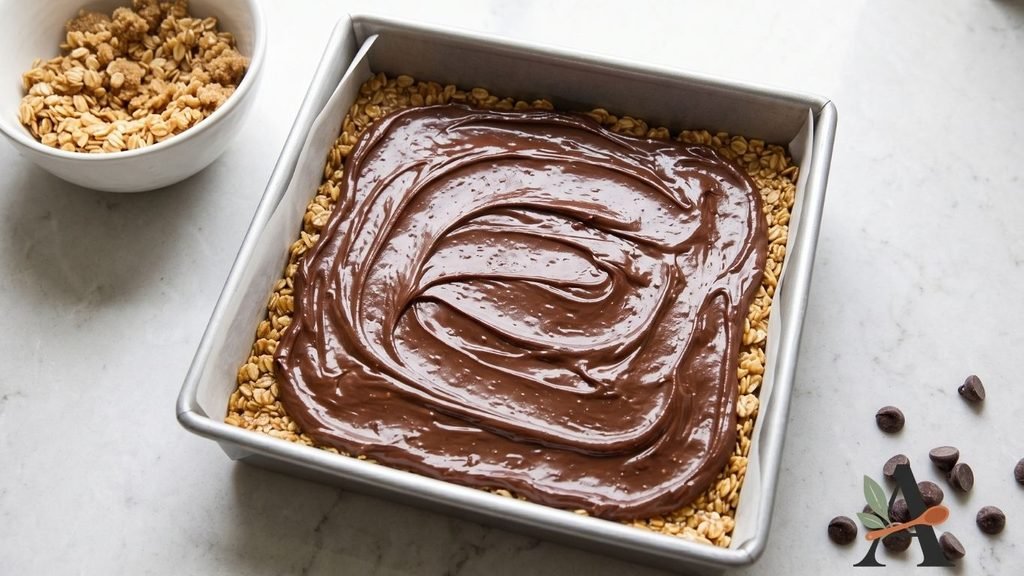
Step 9: Add the Remaining Oats
Distribute the remaining oat mixture evenly over the chocolate layer.
Press it very gently so the pieces adhere without forcing them deeply into the filling.
Drizzle the reserved chocolate over the surface.
Add optional chopped peanuts or flaky salt.
Step 10: Chill Until Firm
Cover the pan and refrigerate it for at least 3–4 hours, preferably overnight.
The chocolate filling and oat layers should feel completely firm before slicing.
Step 11: Remove and Slice
Use the parchment overhang to lift the complete slab from the pan.
Allow it to stand at room temperature for approximately 10 minutes if it is extremely firm.
Cut it into 16 squares or 25 smaller portions with a large, sharp knife.
Wipe the blade between cuts.
Tips for Perfect No-Bake Oat Bars
Use Rolled Oats
Their large flakes create a chewier texture and more stable layers.
Cook the Oat Mixture
The short cooking period softens the oats and helps the butter and sugar bind them together.
Stir Continuously
The sugar mixture can stick or scorch if left unattended.
Press the Base Firmly
A compact base prevents the lower layer from crumbling during slicing.
Melt the Chocolate Gently
Excessive heat can make chocolate thick or grainy.
Use Shelf-Stable Peanut Butter
Its consistent texture creates a filling that sets properly.
Chill the Tray Completely
Partially chilled bars may compress or separate when cut.
Use a Sharp Knife
A clean, sharp blade produces more attractive layers.
Why Are My Oat Bars Crumbly?
Possible causes include:
- The oat mixture was not cooked long enough.
- Too many oats were added.
- The ingredients were measured incorrectly.
- The base was not pressed firmly.
- The tray was sliced before chilling.
- The bars were cut immediately after being removed from a very cold refrigerator.
Measure carefully and ensure the warm oat mixture feels cohesive before pressing it into the pan.
Why Is the Chocolate Layer Too Soft?
The filling may remain soft because of:
- Natural peanut butter containing separated oil.
- Too much peanut butter.
- Too little chocolate.
- Insufficient chilling.
- A warm room.
- Incorrect ingredient measurements.
Return the tray to the refrigerator until fully firm.
Why Did the Layers Separate?
The oat base may have been loose, cold or excessively dry when the chocolate was added.
Press the first layer firmly and spread the filling while the oat mixture remains slightly warm.
Add the upper oat layer before the chocolate sets completely so the layers can adhere.
Easy Recipe Variations
Dark Chocolate Oat Bars
Replace semisweet chocolate with dark chocolate for a less sweet filling.
Milk Chocolate Oat Bars
Use milk chocolate for a sweeter, creamier result.
Almond Butter Oat Bars
Replace the peanut butter with smooth shelf-stable almond butter.
Sunflower Butter Oat Bars
Use sunflower-seed butter for a peanut-free variation. Confirm that every ingredient is suitable for the intended allergy requirements.
Coconut Chocolate Oat Bars
Add toasted desiccated coconut to the oat mixture.
Chocolate Cranberry Oat Bars
Sprinkle finely chopped dried cranberries over the chocolate layer.
Salted Chocolate Oat Bars
Finish the surface with a small amount of flaky salt.
Christmas Chocolate Oat Bars
Decorate the chocolate drizzle with red and green sprinkles.
Can You Make Chocolate Oat Bars Ahead?
Yes.
Prepare the tray up to three days before serving.
Keep it tightly covered in the refrigerator and slice it when required.
The bars may also be cut in advance and stored in layers separated by parchment paper.
How to Store No-Bake Oat Bars
Transfer the sliced bars to an airtight container.
Separate layers with parchment paper.
Refrigerate them for up to one week.
The chocolate and butter soften at room temperature, so keep the bars chilled until shortly before serving.
Can You Freeze Chocolate Oat Bars?
Yes.
Arrange the bars in a freezer-safe container with parchment paper between the layers.
Freeze for up to three months.
Thaw the required portions overnight in the refrigerator.
Keep the container closed while they thaw to reduce condensation on the chocolate.
How to Package Oat Bars as Gifts
Place each chilled bar inside a paper case or wrap it in parchment.
Package the portions inside:
- Small bakery boxes.
- Christmas cookie tins.
- Cellophane treat bags.
- Divided dessert boxes.
- Holiday gift baskets.
Advise recipients to refrigerate the bars.
Include an ingredient and allergen label, particularly because the recipe contains peanuts and dairy.
Frequently Asked Questions
Can I use quick oats?
Yes, but they create a softer and denser texture. Old-fashioned rolled oats are recommended.
Can I use steel-cut oats?
No. Steel-cut oats require more liquid and cooking and will remain too firm in this recipe.
Can I use natural peanut butter?
It is not recommended because separated oil may prevent the chocolate layer from setting properly.
Can I make the bars without peanut butter?
Use a tested alternative such as shelf-stable almond butter or sunflower-seed butter. The taste and firmness may differ.
Can I reduce the sugar?
Reducing the brown sugar may affect the sweetness, moisture and ability of the oat layers to bind.
Do these bars need to be refrigerated?
Yes. Refrigeration keeps the chocolate layer firm and helps the bars retain their shape.
Why is the chocolate difficult to cut?
The tray may be too cold. Allow it to soften briefly and use a warm, dry knife.
How many bars does the recipe make?
The recipe produces 16 standard bars or 25 smaller portions.
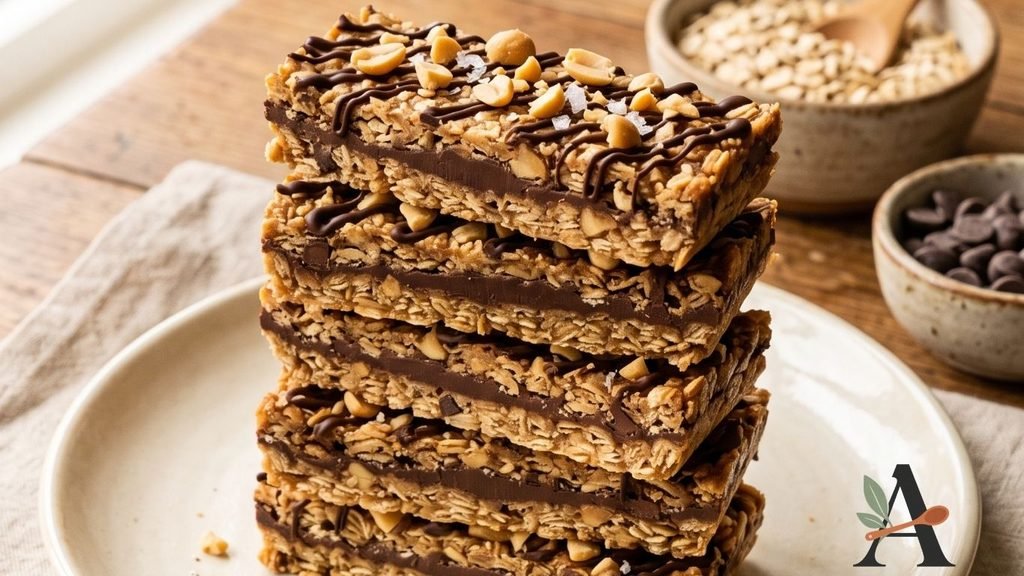
No-Bake Chocolate Oat Bars Recipe Card
Preparation time: 20 minutes
Cooking time: 5 minutes
Chilling time: 3–4 hours
Total time: Approximately 4 hours 25 minutes
Yield: 16–25 bars
Course: Dessert
Cuisine: American
Method: No-bake
Ingredients
Oat Layers
- 1 cup unsalted butter.
- ½ cup packed light brown sugar.
- 1 teaspoon vanilla extract.
- ¼ teaspoon salt.
- 3 cups old-fashioned rolled oats.
Chocolate Filling
- 1½ cups semisweet chocolate chips.
- ¾ cup creamy peanut butter.
- Flaky salt, optional.
- Chopped roasted peanuts, optional.
Instructions
- Grease and line a 9-inch square pan with parchment paper.
- Melt the butter in a large saucepan over medium-low heat.
- Add the brown sugar and salt.
- Stir until evenly combined.
- Add the rolled oats.
- Cook for 4–5 minutes, stirring continuously.
- Remove the saucepan from the heat.
- Stir in the vanilla.
- Press half of the oat mixture firmly into the prepared pan.
- Melt the chocolate chips and peanut butter until smooth.
- Reserve several tablespoons for decorating, if desired.
- Spread the remaining chocolate mixture over the oat base.
- Distribute the remaining oat mixture over the chocolate.
- Press the top layer gently.
- Drizzle with the reserved chocolate.
- Add optional chopped peanuts or flaky salt.
- Cover and refrigerate for 3–4 hours.
- Lift the slab from the pan using the parchment.
- Allow it to soften briefly if necessary.
- Cut into 16–25 portions.
- Store in the refrigerator.
Recipe Notes
- Use old-fashioned rolled oats.
- Cook the oats for the full recommended time.
- Stir the oat mixture continuously.
- Use creamy, shelf-stable peanut butter.
- Press the base firmly into the pan.
- Chill the tray completely before slicing.
- Use a warm, dry knife for clean cuts.
- Test the complete recipe before confirming exact chilling time and yield.