
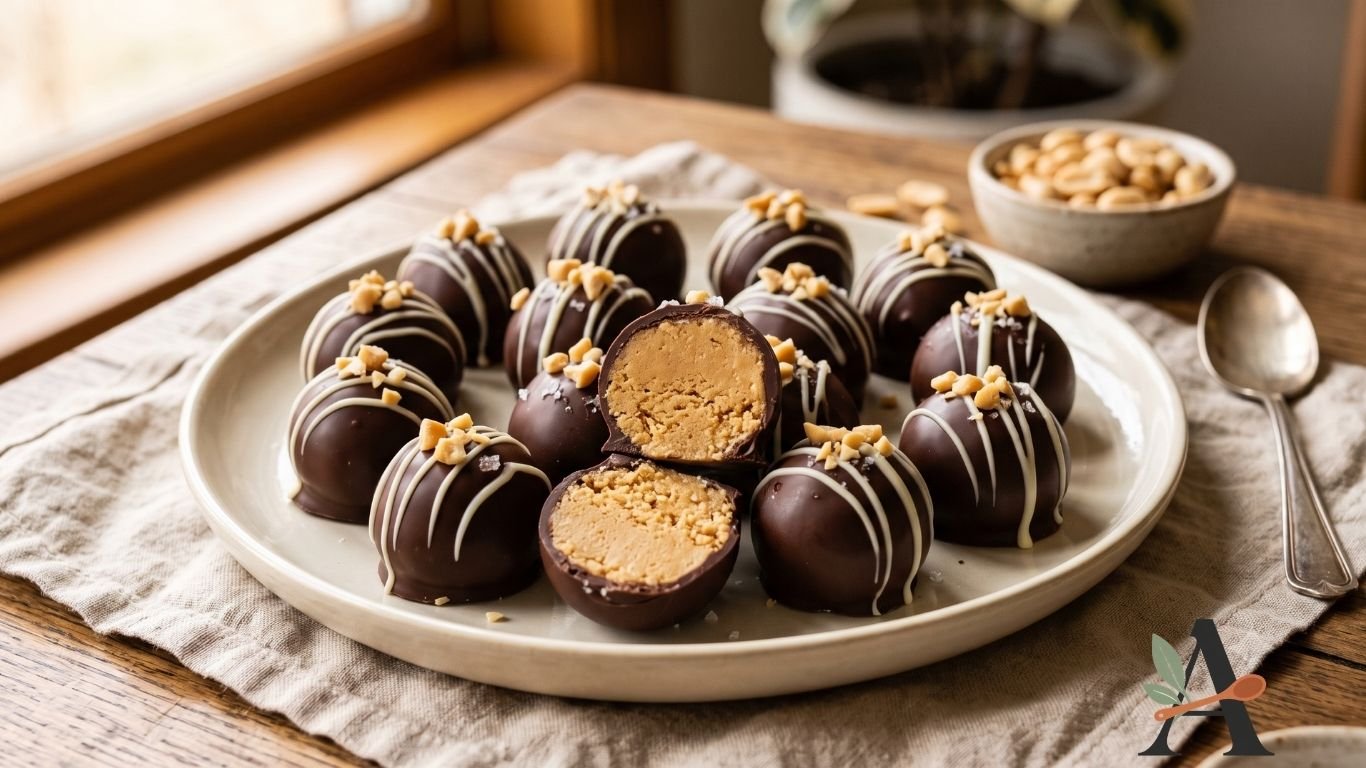
These chocolate peanut butter balls have soft, creamy centres covered with a smooth shell of semisweet chocolate. They deliver the classic combination of chocolate and peanut butter in an easy bite-sized treat.
The recipe requires no baking and can be prepared ahead for Christmas parties, cookie exchanges, dessert trays or homemade gifts.
Decorate the finished sweets with melted white chocolate, chopped peanuts, flaky salt or festive sprinkles.
Why You’ll Love These Peanut Butter Balls
- No baking required.
- Creamy peanut butter centres.
- Smooth chocolate coating.
- Made with simple ingredients.
- Easy to prepare ahead.
- Freezer-friendly.
- Suitable for Christmas gifts.
- Convenient bite-sized portions.
- Easy to decorate.
- Popular throughout the year.
Ingredients You’ll Need
For the Peanut Butter Filling
- 1½ cups creamy peanut butter.
- ½ cup unsalted butter, softened.
- 3 cups powdered sugar, sifted.
- 1 teaspoon pure vanilla extract.
- ¼ teaspoon salt.
For the Chocolate Coating
- 12 ounces semisweet chocolate, chopped.
- 1 tablespoon refined coconut oil or vegetable shortening, optional.
- ¼ cup white chocolate, optional.
- Chopped roasted peanuts, optional.
- Flaky salt, optional.
- Festive sprinkles, optional.
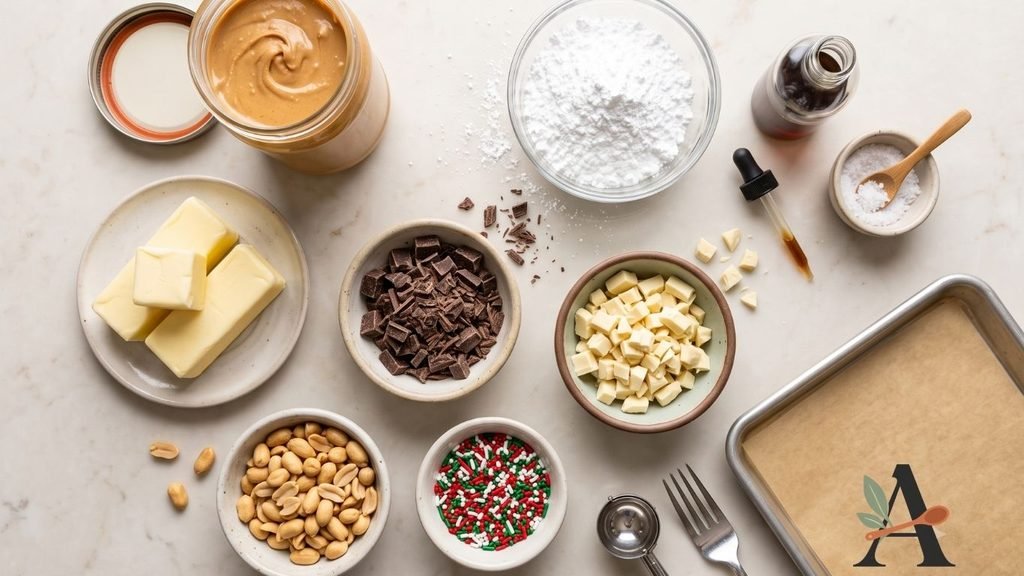
Ingredient Notes
Peanut butter: Use creamy, shelf-stable peanut butter for a smooth filling that holds its shape.
Natural peanut butter: Peanut butter made only from peanuts and salt may separate, creating oily or overly soft centres.
Butter: Softened butter adds richness and helps the filling remain creamy when chilled.
Powdered sugar: Sweetens and firms the peanut butter mixture. Sift it to remove lumps.
Vanilla: Adds warmth and complements the chocolate.
Chocolate: Semisweet chocolate balances the sweet filling. Use good-quality bars, melting wafers or suitable coating chocolate.
Coconut oil: A small optional amount thins the melted chocolate and helps create a smooth coating.
Decorations: Add toppings before the chocolate sets so they adhere properly.
Are These the Same as Buckeye Candies?
The filling is similar, but the coating method is different.
Traditional buckeye candies are dipped only partially, leaving a small circle of peanut butter visible at the top. This gives them the appearance of a buckeye nut.
Chocolate peanut butter balls are covered completely in chocolate.
You can use this recipe for either style by adjusting how deeply each centre is dipped.
What Type of Peanut Butter Works Best?
Use smooth, shelf-stable peanut butter for the most predictable consistency.
Reduced-fat and natural peanut butter varieties may contain different proportions of oil, sugar and stabilisers. These differences can affect the firmness of the filling.
Crunchy peanut butter can be used for additional texture, but the surface may be less smooth.
How to Make Chocolate Peanut Butter Balls
Step 1: Prepare the Baking Sheets
Line one or two rimmed baking sheets with parchment paper.
Ensure there is enough refrigerator or freezer space for the trays.
Step 2: Beat the Peanut Butter and Butter
Place the creamy peanut butter and softened butter in a large mixing bowl.
Beat with an electric mixer until smooth and evenly combined.
Scrape the sides and bottom of the bowl.
Step 3: Add the Vanilla and Salt
Add the vanilla extract and salt.
Mix until evenly incorporated.
Step 4: Add the Powdered Sugar
Sift the powdered sugar into the bowl gradually.
Mix on low speed after each addition.
The filling will become thick and may appear slightly crumbly before it comes together.
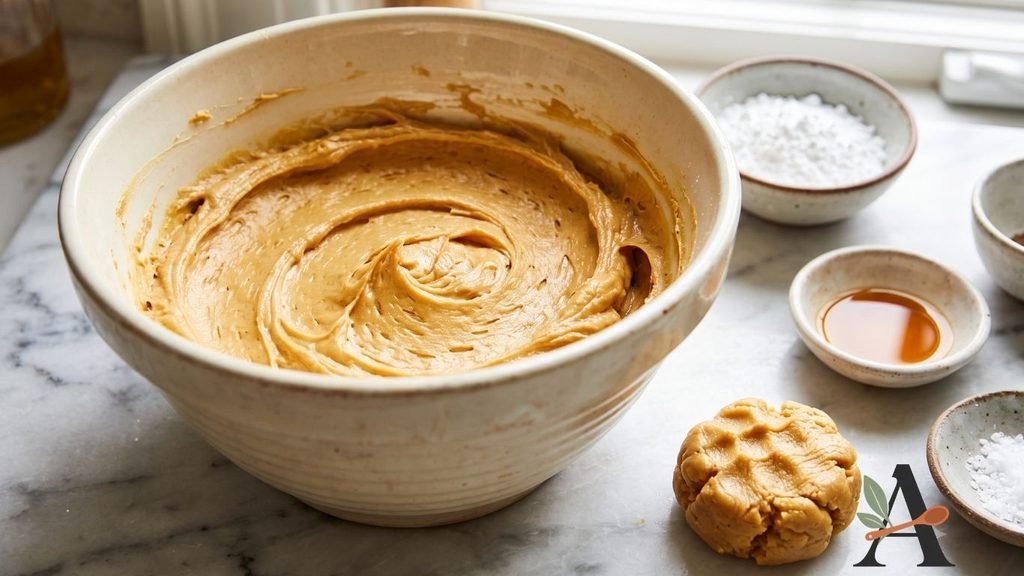
Step 5: Check the Consistency
Press a small amount of filling between your fingers.
It should feel soft but should hold its shape without sticking heavily.
If it is very soft, refrigerate it briefly before rolling.
If it will not hold together, mix it for a little longer before adding anything.
Step 6: Portion the Filling
Scoop approximately one tablespoon of filling for each sweet.
For equally sized portions, use a small cookie scoop or weigh each piece.
Step 7: Roll Into Balls
Roll each portion gently between clean palms.
Arrange the balls on the lined baking sheet without allowing them to touch.
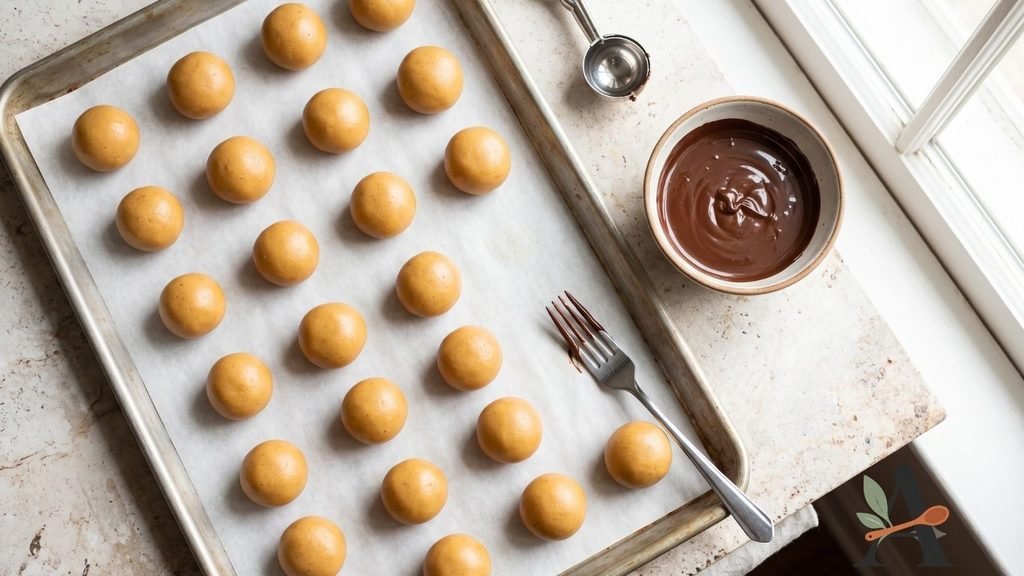
Step 8: Chill Until Firm
Refrigerate the peanut butter balls for approximately 1 hour, or freeze them for 20–30 minutes.
They should feel firm enough to dip but should not be frozen solid.
Step 9: Melt the Chocolate
Place the chopped chocolate and optional coconut oil in a microwave-safe bowl.
Heat in short intervals, stirring thoroughly after each one, until smooth.
Alternatively, melt the chocolate in a heatproof bowl over a pan of barely simmering water.
Keep all water and steam away from the chocolate.
Step 10: Dip the Peanut Butter Balls
Place one chilled ball on a dipping tool or fork.
Lower it into the melted chocolate and cover it completely.
Lift it out and tap the fork gently against the bowl to remove excess chocolate.
Slide the coated ball back onto the parchment.
Step 11: Decorate the Tops
Before the coating sets, add:
- Chopped roasted peanuts.
- Flaky salt.
- Christmas sprinkles.
- Fine biscuit crumbs.
Alternatively, allow the coating to set and drizzle the tops with melted white chocolate.
Step 12: Let the Chocolate Set
Refrigerate the dipped peanut butter balls for approximately 20–30 minutes, or until the coating is firm.
Serve chilled or allow them to soften for several minutes at room temperature.
Tips for Smooth Chocolate Coating
Chill the Centres
Firm centres are easier to dip and less likely to fall apart.
Avoid Freezing Them Solid
Frozen centres can expand as they warm, potentially causing the chocolate coating to crack.
Chop the Chocolate Evenly
Small, even pieces melt more consistently.
Melt the Chocolate Gently
Excessive heat can make chocolate thick, dull or grainy.
Use a Deep, Narrow Bowl
A deeper pool of chocolate makes complete coating easier.
Remove Excess Chocolate
Tap the dipping tool gently so the coating does not form a large puddle around the base.
Work in Small Batches
Keep most of the peanut butter balls refrigerated and remove only a few at a time.
Add Decorations Immediately
Sprinkles and chopped peanuts must be added while the coating remains wet.
Why Is My Peanut Butter Filling Too Soft?
Possible causes include:
- Using natural peanut butter.
- Butter that was melted rather than softened.
- Too little powdered sugar.
- A warm kitchen.
- Insufficient chilling.
- Incorrect ingredient measurements.
Refrigerate the mixture before adding more sugar. It may firm significantly when cold.
Why Is the Filling Crumbly?
The filling may appear crumbly while the powdered sugar is being added.
Continue mixing and press a small amount together before adjusting it.
Excessive crumbliness can result from:
- Too much powdered sugar.
- Too little peanut butter.
- Butter that is too cold.
- Inaccurate measurements.
- A particularly dry brand of peanut butter.
Work the mixture gently until it forms a smooth ball.
Why Is My Melted Chocolate Thick?
Chocolate may become thick because it was overheated or came into contact with water.
Other causes include using chocolate that is not designed for melting or allowing it to cool during dipping.
Reheat it gently for a few seconds and stir well. An optional small amount of refined coconut oil can improve the consistency.
Why Did the Chocolate Crack?
The coating can crack when very cold or frozen centres expand after dipping.
Allow frozen peanut butter balls to sit briefly before coating them.
Use chilled rather than completely frozen centres and avoid making the chocolate shell unnecessarily thick.
Easy Recipe Variations
White Chocolate Peanut Butter Balls
Dip the centres in melted white chocolate and decorate them with peanut crumbs.
Dark Chocolate Peanut Butter Balls
Use dark chocolate for a less sweet coating.
Crunchy Peanut Butter Balls
Replace some or all of the creamy peanut butter with crunchy peanut butter.
Oreo Peanut Butter Balls
Mix finely crushed chocolate sandwich biscuits into the filling. Test the amount because they change the sweetness and structure.
Pretzel Peanut Butter Balls
Add finely crushed pretzels for a salty crunch.
Rice Cereal Peanut Butter Balls
Fold crisp rice cereal into the filling for additional texture.
Christmas Peanut Butter Balls
Decorate the wet coating with red, green and white sprinkles.
Buckeye Candies
Leave a small circle of peanut butter uncovered at the top during dipping.
Can You Make Peanut Butter Balls Ahead?
Yes.
Prepare and coat them up to one week before serving.
Keep the sweets inside an airtight container in the refrigerator.
For the neatest appearance, add any delicate drizzles or decorations after the chocolate coating has set.
How to Store Chocolate Peanut Butter Balls
Arrange the sweets in an airtight container.
Separate stacked layers with parchment paper.
Refrigerate for up to one week.
Keep them away from strong-smelling foods because chocolate and peanut butter can absorb surrounding odours.
Can You Freeze Peanut Butter Balls?
Yes.
Place the finished sweets in a freezer-safe container with parchment between the layers.
Freeze for up to three months.
Thaw them overnight in the refrigerator while the container remains closed. This helps prevent condensation from forming directly on the chocolate.
How to Package Peanut Butter Balls as Gifts
Place each sweet inside a small paper or foil case.
Arrange them inside:
- Christmas candy boxes.
- Cookie tins.
- Cellophane treat bags.
- Divided dessert boxes.
- Holiday gift baskets.
Keep the package cool and advise the recipient to refrigerate it.
Include an ingredient and allergen label because the recipe contains peanuts and dairy.
Frequently Asked Questions
Can I use natural peanut butter?
It is not recommended because separated oil may produce a soft or greasy filling.
Can I make these without an electric mixer?
Yes. Use a sturdy wooden spoon, although the mixture becomes thick as the powdered sugar is added.
Can I use chocolate chips for dipping?
Yes, but some chocolate chips contain stabilisers that make them thicker when melted. Add a small amount of refined coconut oil if needed.
Do peanut butter balls need to be refrigerated?
Refrigeration keeps the centres firm and preserves the chocolate coating.
Can I use salted butter?
Yes. Omit or reduce the added salt.
Why are there holes in the coating?
Air bubbles or contact with the dipping fork can create small gaps. Cover them with a little additional melted chocolate.
How do I remove the fork mark?
Drizzle a small amount of chocolate over the mark or cover it with decoration.
How many sweets does the recipe make?
The recipe produces approximately 30–36 peanut butter balls, depending on their size.

Chocolate Peanut Butter Balls Recipe Card
Preparation time: 30 minutes
Chilling time: Approximately 1 hour 30 minutes
Total time: Approximately 2 hours
Yield: 30–36 sweets
Course: Dessert
Cuisine: American
Method: No-bake
Ingredients
Peanut Butter Filling
- 1½ cups creamy peanut butter.
- ½ cup unsalted butter, softened.
- 3 cups powdered sugar, sifted.
- 1 teaspoon vanilla extract.
- ¼ teaspoon salt.
Chocolate Coating
- 12 ounces semisweet chocolate, chopped.
- 1 tablespoon refined coconut oil or vegetable shortening, optional.
- ¼ cup white chocolate, optional.
- Chopped roasted peanuts, optional.
- Flaky salt, optional.
- Festive sprinkles, optional.
Instructions
- Line one or two baking sheets with parchment paper.
- Beat the creamy peanut butter and softened butter until smooth.
- Mix in the vanilla and salt.
- Gradually add the sifted powdered sugar.
- Mix until a thick filling forms.
- Portion approximately one tablespoon of filling for each sweet.
- Roll the portions into smooth balls.
- Arrange them on the lined baking sheet.
- Refrigerate for one hour or freeze for 20–30 minutes.
- Melt the chocolate with the optional coconut oil.
- Dip each chilled peanut butter ball into the chocolate.
- Allow the excess coating to drip into the bowl.
- Return each sweet to the parchment.
- Add optional toppings before the coating sets.
- Refrigerate for 20–30 minutes.
- Add an optional white-chocolate drizzle.
- Store in an airtight container in the refrigerator.
Recipe Notes
- Use creamy, shelf-stable peanut butter.
- Soften rather than melt the butter.
- Sift the powdered sugar.
- Chill the centres before dipping.
- Avoid freezing the centres completely solid.
- Keep water away from the melting chocolate.
- Work with a few chilled centres at a time.
- Test the complete recipe before confirming exact chilling time and yield.