
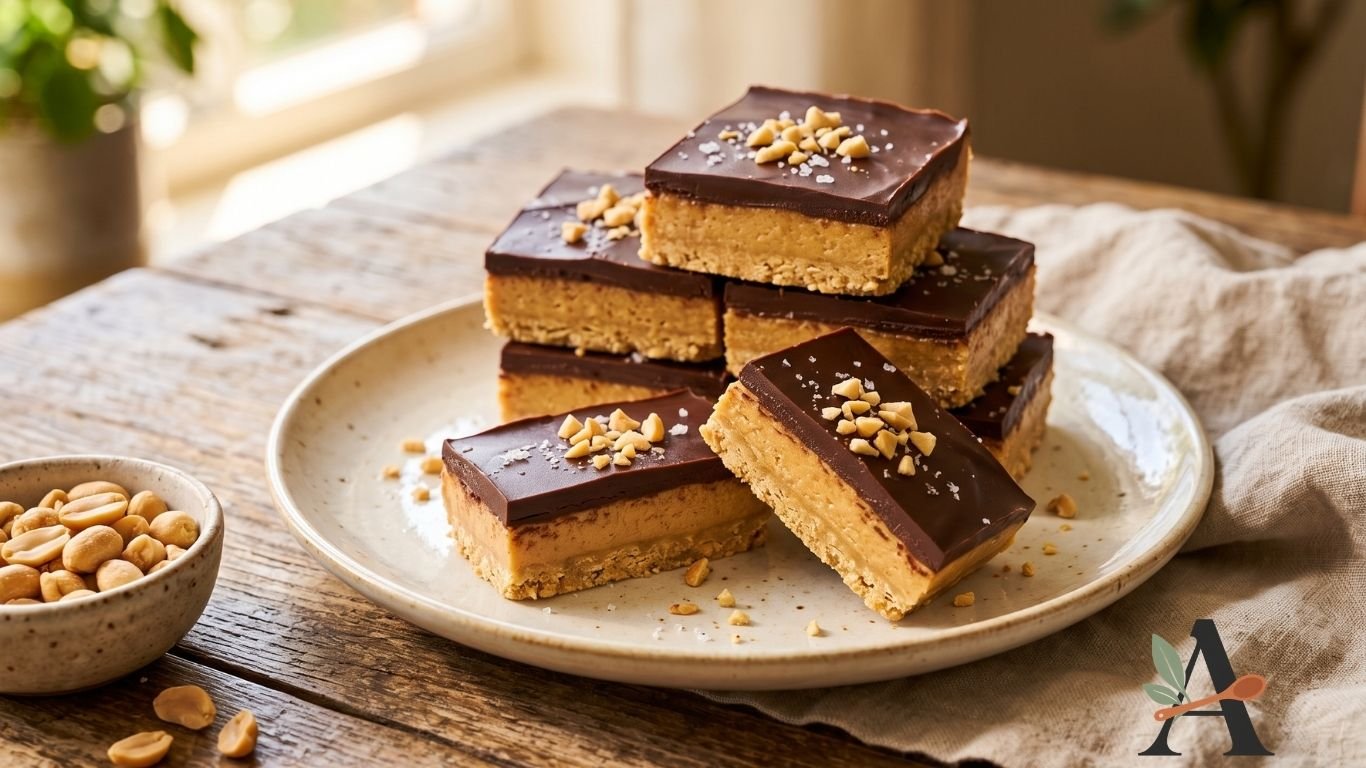
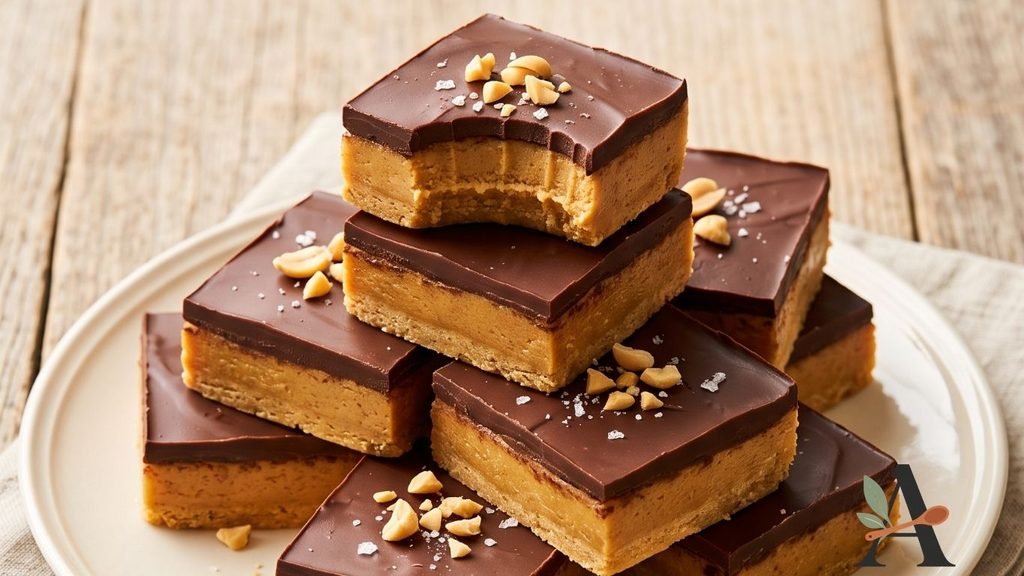
These no-bake chocolate peanut butter bars have a rich, creamy peanut butter base and a smooth semisweet chocolate topping. The combination tastes similar to a peanut butter cup but requires no individual shaping or baking.
The recipe is prepared in one square pan using simple ingredients. After chilling, the firm tray can be sliced into neat squares for parties, gifts or holiday dessert boxes.
Serve the bars chilled or allow them to soften briefly at room temperature for a creamier texture.
Why You’ll Love These Peanut Butter Bars
- No oven required.
- Rich peanut butter flavour.
- Smooth chocolate topping.
- Simple pantry ingredients.
- Easy to prepare in one pan.
- Suitable for making ahead.
- Freezer-friendly.
- Easy to slice into small portions.
- Ideal for parties and gifts.
- Delicious throughout the year.
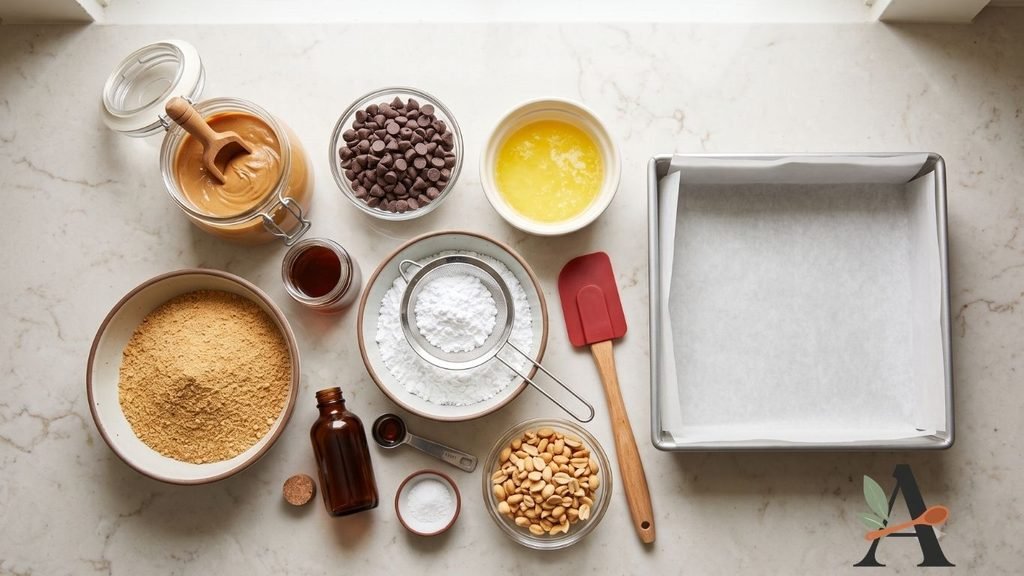
Ingredients You’ll Need
For the Peanut Butter Base
- 1 cup unsalted butter, melted.
- 1½ cups creamy peanut butter.
- 2 cups graham cracker crumbs.
- 2 cups powdered sugar, sifted.
- 1 teaspoon pure vanilla extract.
- ¼ teaspoon salt.
For the Chocolate Topping
- 2 cups semisweet chocolate chips.
- ¼ cup creamy peanut butter.
- Flaky salt or chopped peanuts, optional.
Ingredient Notes
Peanut butter: Use a smooth, shelf-stable commercial peanut butter for the most predictable texture.
Natural peanut butter: Varieties containing only peanuts and salt may separate or create a softer, oilier base.
Butter: Melted butter binds the crumbs and gives the base a rich texture.
Graham cracker crumbs: Add structure and a light biscuit flavour. Crush them finely for a smooth base.
Powdered sugar: Sweetens and firms the peanut butter layer without creating a grainy texture.
Vanilla: Adds warmth and complements both the chocolate and peanut butter.
Chocolate chips: Semisweet chocolate balances the sweet base. Milk chocolate creates a sweeter result.
Salt: A small amount balances the sweetness and intensifies the peanut butter flavour.
What Type of Peanut Butter Should You Use?
Use creamy, shelf-stable peanut butter for bars that set firmly and slice cleanly.
Natural peanut butter often separates into oil and solids. This can make the base greasy or prevent it from firming properly.
Avoid reduced-fat peanut butter because its additional ingredients and lower fat content can alter the texture.
Crunchy peanut butter may be used when you want additional texture, but the cut edges will not appear as smooth.
How to Make No-Bake Chocolate Peanut Butter Bars
Step 1: Prepare the Pan
Lightly grease a 9-inch square pan.
Line it with parchment paper, leaving an overhang on two sides.
The parchment creates handles for removing the chilled bars.
Step 2: Crush the Graham Crackers
Place the graham crackers in a food processor and process them into fine, even crumbs.
Alternatively, seal them inside a strong food-storage bag and crush them with a rolling pin.
Avoid leaving large pieces, as these can cause the base to crumble when sliced.
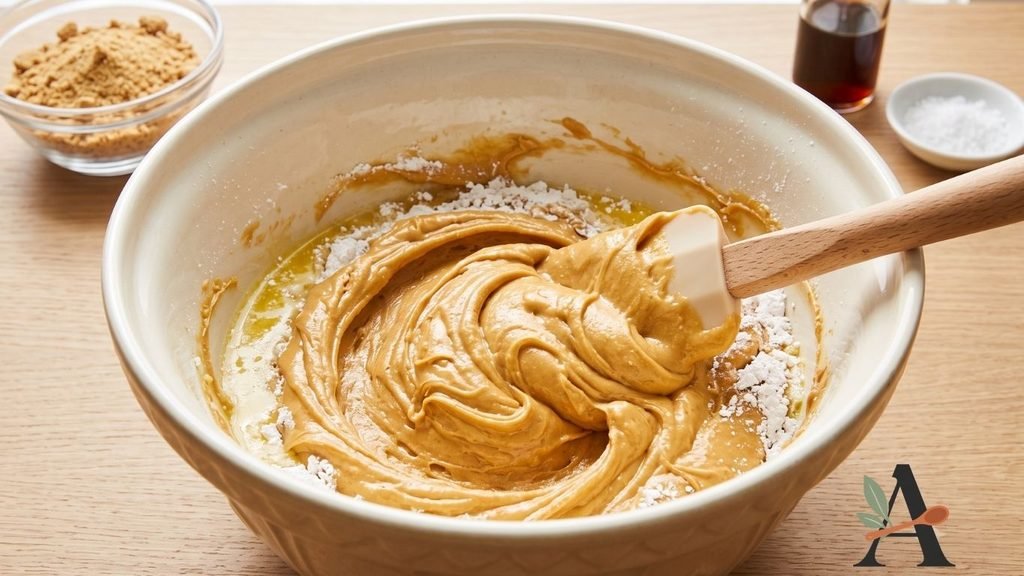
Step 3: Combine the Butter and Peanut Butter
Place the melted butter and creamy peanut butter in a large mixing bowl.
Whisk until completely smooth.
Add the vanilla and salt.
Step 4: Add the Powdered Sugar
Sift the powdered sugar into the peanut butter mixture in several additions.
Stir thoroughly after each addition.
The mixture will gradually become thick.
Step 5: Add the Graham Cracker Crumbs
Fold in the finely crushed graham crackers.
Mix until no dry crumbs remain and the mixture looks evenly combined.
It should be thick, soft and easy to press.
Step 6: Press the Base Into the Pan
Transfer the peanut butter mixture to the prepared pan.
Spread it towards the corners.
Place a second sheet of parchment over the surface and press firmly with the bottom of a measuring cup or flat glass.
Remove the top sheet and smooth any uneven areas.
Step 7: Make the Chocolate Topping
Place the semisweet chocolate chips and ¼ cup peanut butter in a microwave-safe bowl.
Heat in short intervals, stirring thoroughly after each interval, until smooth.
Alternatively, melt them in a heatproof bowl over a pan of barely simmering water.
Avoid overheating the chocolate.
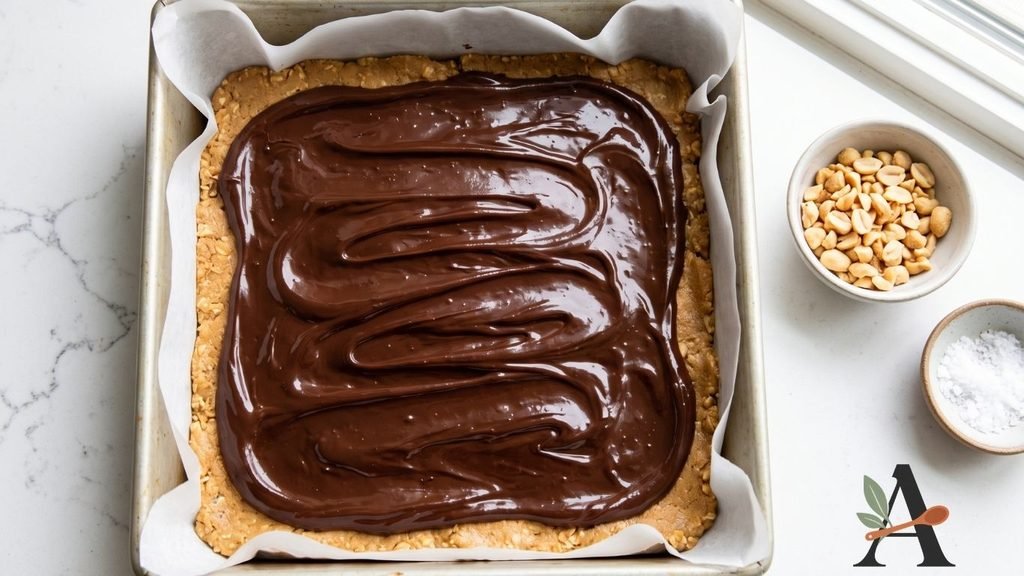
Step 8: Add the Chocolate Layer
Pour the melted chocolate mixture over the peanut butter base.
Spread it into a smooth, even layer with an offset spatula.
Add optional chopped peanuts or flaky salt before the topping sets.
Step 9: Chill Until Firm
Refrigerate the pan for approximately 2–3 hours, or until both layers are firm.
Do not attempt to slice the bars while the filling is soft.
Step 10: Remove From the Pan
Use the parchment overhang to lift the complete slab from the pan.
Place it on a cutting board.
Allow it to stand at room temperature for approximately 10–15 minutes if the chocolate is extremely firm.
Step 11: Slice the Bars
Use a large, sharp knife to cut the slab into 16 squares or 25 smaller portions.
For clean cuts, warm the knife under hot water and dry it thoroughly.
Wipe the blade between cuts.
Tips for Perfect Peanut Butter Bars
Use Shelf-Stable Peanut Butter
Its consistent texture helps the base set and prevents excess oil.
Crush the Crackers Finely
Fine crumbs create a smooth layer that holds together when sliced.
Sift the Powdered Sugar
Removing lumps prevents pockets of dry sugar inside the base.
Press the Base Firmly
Compacting the mixture gives the bars clean edges and prevents crumbling.
Melt the Chocolate Gently
Overheated chocolate can become thick, grainy or scorched.
Add Peanut Butter to the Topping
Peanut butter makes the chocolate layer softer and easier to slice.
Chill the Bars Completely
A fully chilled slab produces cleaner portions.
Avoid Cutting Them Ice-Cold
Allowing the tray to soften briefly reduces the chance of the chocolate cracking.
How to Stop the Chocolate Topping From Cracking
A very firm layer of plain chocolate can break when sliced.
Mixing peanut butter into the melted chocolate keeps the topping slightly softer.
Additional precautions include:
- Spreading the topping in an even layer.
- Avoiding excessive chilling.
- Allowing the slab to stand briefly before cutting.
- Using a warm, dry knife.
- Applying steady downward pressure.
- Wiping the blade between cuts.
Do not use a sawing motion, which can separate the layers.
Why Is My Peanut Butter Base Too Soft?
Possible causes include:
- Using natural peanut butter.
- Adding too much butter.
- Measuring too little powdered sugar.
- Measuring too few cracker crumbs.
- Insufficient chilling.
- Leaving the bars in a warm room.
Return the pan to the refrigerator until completely firm.
Avoid adding ingredients after the chocolate layer has been applied.
Why Is My Peanut Butter Base Crumbly?
The base may crumble because of:
- Too many graham cracker crumbs.
- Too much powdered sugar.
- Too little peanut butter or butter.
- Coarse cracker pieces.
- Insufficient pressing.
- Cutting the slab while extremely cold.
Measure the dry ingredients accurately and compact the base firmly.
Easy Recipe Variations
Milk Chocolate Peanut Butter Bars
Replace the semisweet chocolate with milk chocolate for a sweeter topping.
Dark Chocolate Peanut Butter Bars
Use dark chocolate containing your preferred cocoa percentage.
Crunchy Peanut Butter Bars
Replace some or all of the creamy peanut butter with crunchy peanut butter.
Pretzel Peanut Butter Bars
Replace a measured portion of the graham cracker crumbs with finely crushed pretzels.
Oreo Peanut Butter Bars
Use finely crushed chocolate sandwich biscuits in place of the graham crackers. Test the quantity because the filling changes the moisture and sweetness.
Salted Peanut Butter Bars
Finish the chocolate topping with flaky salt.
Peanut Butter Cup Bars
Press chopped miniature peanut butter cups over the chocolate before it sets.
Christmas Peanut Butter Bars
Decorate the topping with red and green sprinkles or festive candy-coated chocolates.
Can You Make Peanut Butter Bars Ahead?
Yes.
Prepare the bars up to three days before serving.
Keep the tray covered in the refrigerator and slice it when required.
For the neatest presentation, store the bars in a single layer or separate stacked layers with parchment paper.
How to Store Chocolate Peanut Butter Bars
Place the bars in an airtight container.
Refrigerate them for up to one week.
The bars soften at room temperature, so avoid leaving them in a warm area for extended periods.
For a creamier texture, remove individual portions from the refrigerator approximately 10 minutes before serving.
Can You Freeze Peanut Butter Bars?
Yes.
Arrange the chilled bars in a freezer-safe container.
Place parchment paper between layers and seal the container tightly.
Freeze for up to three months.
Thaw the required portions overnight in the refrigerator.
Condensation can affect the chocolate surface, so allow the bars to thaw inside their closed container.
How to Package the Bars as Gifts
Keep the bars chilled until shortly before packaging.
Place individual squares inside paper cases or wrap them in parchment.
Arrange them inside:
- Small bakery boxes.
- Christmas cookie tins.
- Cellophane treat bags.
- Divided dessert boxes.
- Holiday gift baskets.
Advise recipients to refrigerate the bars.
Always include an ingredient and allergen label because the recipe contains peanuts and dairy.
Frequently Asked Questions
Do these peanut butter bars need to be refrigerated?
Yes. Refrigeration keeps the layers firm and preserves their texture.
Can I use natural peanut butter?
It is not recommended because separated oil can prevent the bars from setting properly.
Can I use digestive biscuits instead of graham crackers?
Yes, but their sweetness and fat content differ. Adjust the quantity after testing the mixture’s consistency.
Can I make the bars without graham crackers?
Use a tested alternative such as finely crushed digestive biscuits, pretzels or suitable gluten-free biscuits.
Can I use salted butter?
Yes. Omit or reduce the added salt.
Can I melt the chocolate in a saucepan?
Yes, but use very low heat and stir continuously to prevent scorching.
Why did the layers separate?
The base may have been loose, oily or extremely cold when the topping was added. Press it firmly and spread the chocolate gently.
How do I get clean cuts?
Chill the slab, let it soften briefly and cut it with a warm, completely dry knife.
How many bars does the recipe make?
The recipe produces 16 standard bars or 25 smaller party portions.
No-Bake Chocolate Peanut Butter Bars Recipe Card
Preparation time: 20 minutes
Chilling time: 2–3 hours
Total time: Approximately 3 hours 20 minutes
Yield: 16–25 bars
Course: Dessert
Cuisine: American
Method: No-bake
Ingredients
Peanut Butter Base
- 1 cup unsalted butter, melted.
- 1½ cups creamy peanut butter.
- 2 cups graham cracker crumbs.
- 2 cups powdered sugar, sifted.
- 1 teaspoon vanilla extract.
- ¼ teaspoon salt.
Chocolate Topping
- 2 cups semisweet chocolate chips.
- ¼ cup creamy peanut butter.
- Flaky salt or chopped peanuts, optional.
Instructions
- Grease and line a 9-inch square pan with parchment paper.
- Crush the graham crackers into fine crumbs.
- Whisk together the melted butter and peanut butter.
- Add the vanilla and salt.
- Gradually mix in the powdered sugar.
- Fold in the graham cracker crumbs.
- Transfer the mixture to the prepared pan.
- Press it into a firm, even layer.
- Place the chocolate chips and peanut butter in a heatproof bowl.
- Melt them gently until smooth.
- Pour the chocolate over the peanut butter base.
- Spread it into an even layer.
- Add optional chopped peanuts or flaky salt.
- Refrigerate for 2–3 hours, until firm.
- Lift the slab from the pan using the parchment.
- Let it stand briefly if the chocolate is extremely firm.
- Cut into 16–25 portions with a warm, dry knife.
- Store the bars in the refrigerator.
Recipe Notes
- Use smooth, shelf-stable peanut butter.
- Crush the graham crackers finely.
- Sift the powdered sugar.
- Compact the base firmly.
- Melt the chocolate gently.
- Chill the complete tray before slicing.
- Allow an extremely cold slab to soften briefly to prevent cracking.
- Test the complete recipe before confirming exact chilling time and yield.