
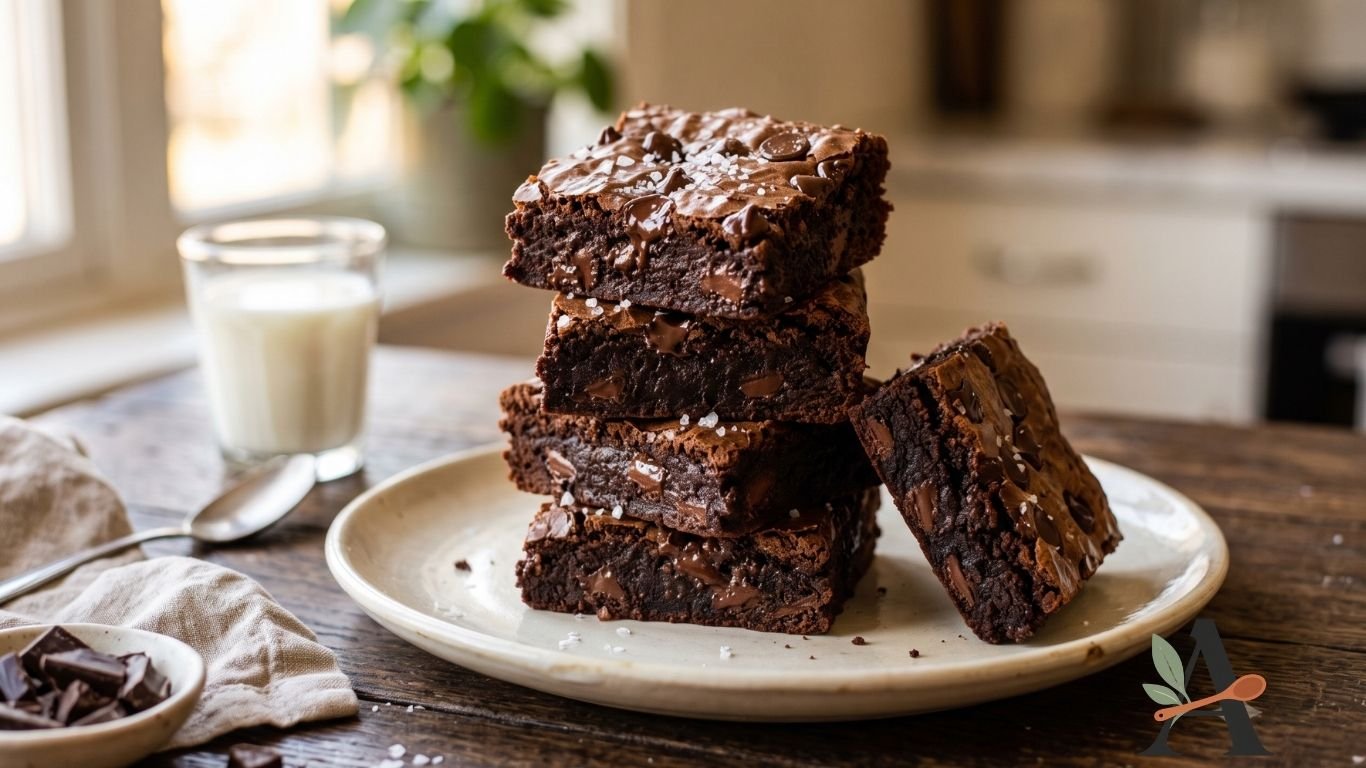
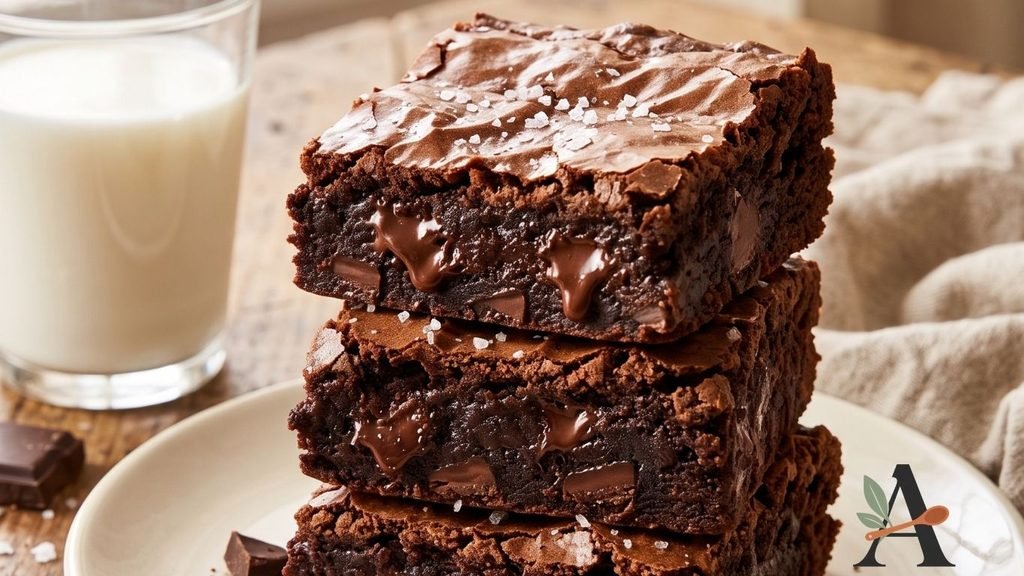
These fudgy chocolate brownies have dense, moist centres, chewy edges and a thin, crackly top. Cocoa powder creates a rich chocolate flavour, while chopped chocolate adds soft melted pockets throughout the tray.
The batter is mixed in one bowl without an electric mixer. Once baked, allow the brownies to cool completely before slicing them into clean squares.
Serve them plain, dust them with powdered sugar or add vanilla ice cream and warm chocolate sauce for a richer dessert.
Why You’ll Love These Homemade Brownies
- Dense and fudgy centres.
- Chewy outer edges.
- Thin, shiny top.
- Rich chocolate flavour.
- Melted chocolate pieces.
- Mixed in one bowl.
- No electric mixer required.
- Easy to prepare ahead.
- Freezer-friendly.
- Suitable for parties and gifts.
Ingredients You’ll Need
- ¾ cup unsalted butter, melted.
- 1¼ cups granulated sugar.
- ½ cup packed light brown sugar.
- 3 large eggs, at room temperature.
- 2 teaspoons pure vanilla extract.
- ¾ cup unsweetened cocoa powder.
- ¾ cup all-purpose flour.
- ½ teaspoon salt.
- 1 cup semisweet chocolate chips or chopped chocolate.
- 1 teaspoon instant espresso powder, optional.
- Flaky salt, optional.
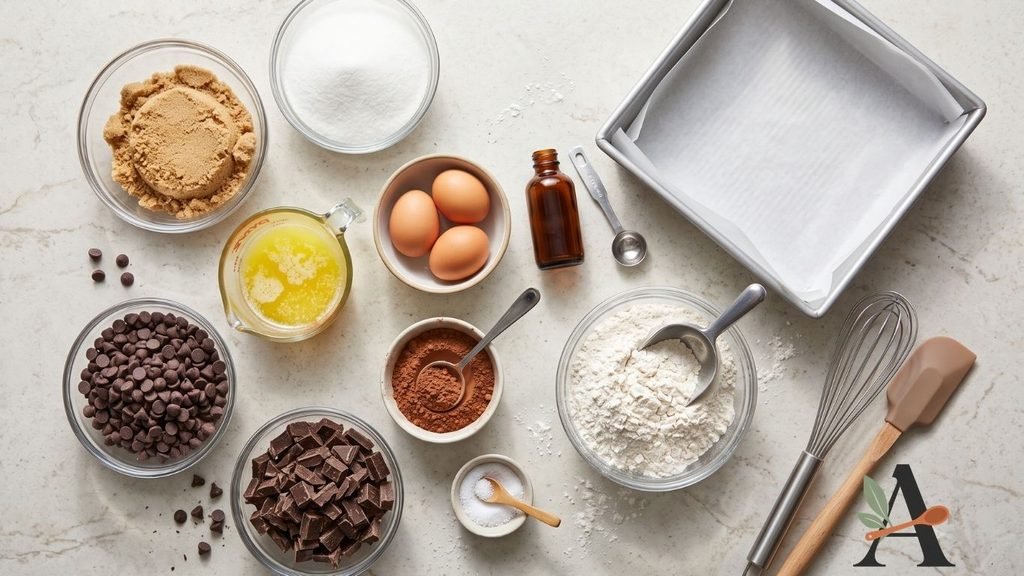
Ingredient Notes
Butter: Melted butter produces a dense, rich texture and makes the batter easy to mix by hand.
Granulated sugar: Provides sweetness and helps create the thin, crackly surface.
Brown sugar: Adds moisture, chewiness and a subtle caramel flavour.
Eggs: Eggs provide structure and help create a glossy top. Room-temperature eggs incorporate more smoothly.
Cocoa powder: Use unsweetened cocoa powder. Natural cocoa creates a familiar brownie flavour, while Dutch-processed cocoa produces a darker result.
Flour: A relatively small quantity of flour keeps the brownies dense rather than cakey.
Chocolate: Semisweet chocolate balances the sweet batter and creates melted pockets.
Espresso powder: Optional, but a small quantity intensifies the chocolate without making the brownies taste strongly of coffee.
Salt: Enhances the chocolate flavour and balances the sugar.
Natural or Dutch-Processed Cocoa?
Natural cocoa powder has a lighter colour and a sharper chocolate flavour.
Dutch-processed cocoa is darker, smoother and less acidic.
Because this recipe does not depend upon cocoa reacting with baking soda, either type may work, but the colour and flavour will differ. Test your chosen cocoa before publishing the finished recipe.
Avoid sweetened drinking-chocolate powder because it contains sugar and other ingredients that alter the formula.
What Pan Should You Use?
Use a light-coloured metal 9-inch square baking pan.
Metal conducts heat efficiently and helps the brownies bake evenly. A dark pan may brown the edges more quickly.
Glass and ceramic dishes retain heat longer and may require adjustments to the baking time.
Line the pan with parchment paper, leaving an overhang on two sides. The overhang creates handles for lifting out the cooled brownies.
How to Make Fudgy Chocolate Brownies
Step 1: Prepare the Oven and Pan
Preheat the oven to 350°F.
Lightly grease a 9-inch square metal baking pan.
Line it with parchment paper, leaving an overhang on two sides.
Grease the parchment lightly.
Step 2: Melt the Butter
Place the butter in a large heatproof bowl.
Melt it gently in the microwave or over a pan of barely simmering water.
The butter should be completely melted but not bubbling hot.
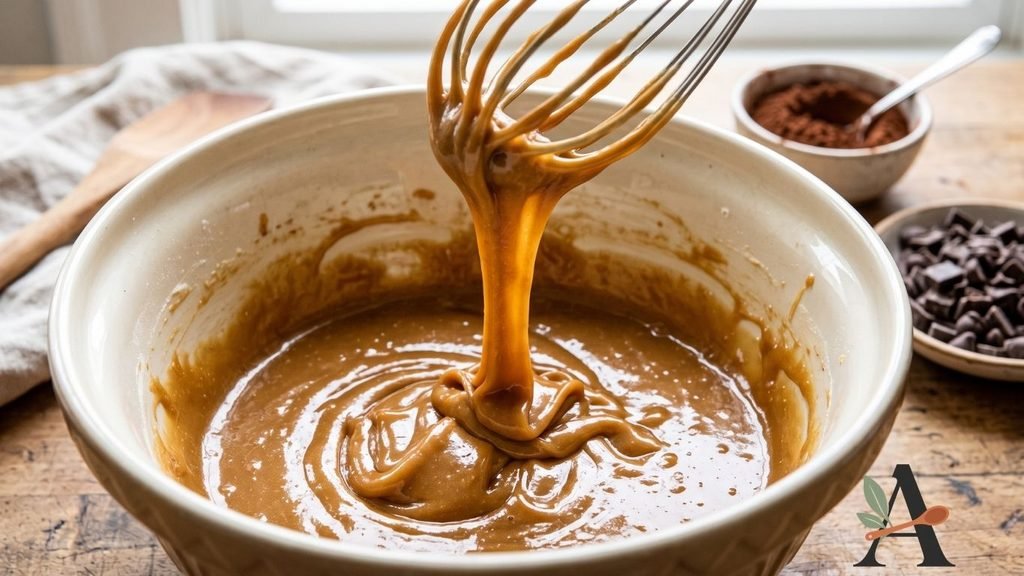
Step 3: Add the Sugars
Add the granulated sugar and brown sugar to the warm butter.
Whisk vigorously for approximately one minute, breaking up any brown-sugar lumps.
The mixture will look thick and slightly grainy.
Step 4: Add the Eggs
Allow the butter mixture to cool briefly if it feels hot.
Add the eggs one at a time, whisking thoroughly after each addition.
Continue whisking for approximately 1–2 minutes, until the mixture looks smooth, thick and glossy.
Step 5: Add the Vanilla
Add the vanilla and optional espresso powder.
Whisk until evenly combined.
Step 6: Add the Cocoa Powder
Sift the cocoa powder over the wet mixture.
Add the salt.
Fold gently until the cocoa is incorporated and no dry lumps remain.
Step 7: Add the Flour
Sift in the flour.
Fold with a spatula until only a few pale streaks remain.
Avoid beating or mixing excessively because this can make the brownies cakey or tough.
Step 8: Add the Chocolate
Reserve a small handful of chocolate for the top.
Fold the remaining chocolate chips or chunks into the batter.
Mix only until evenly distributed.
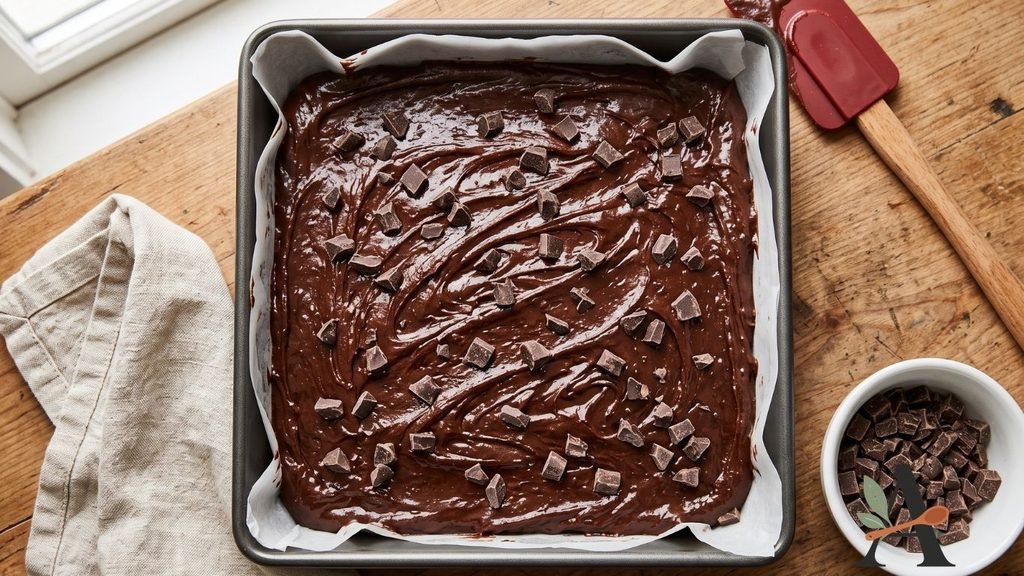
Step 9: Fill the Pan
Transfer the thick batter to the prepared pan.
Spread it evenly into the corners and smooth the surface.
Scatter the reserved chocolate over the top.
Step 10: Bake the Brownies
Bake at 350°F for approximately 24–30 minutes.
The brownies are ready when:
- The top looks shiny and set.
- Small cracks appear across the surface.
- The edges have risen slightly.
- The centre no longer moves like liquid batter.
- A toothpick emerges with moist crumbs.
Do not wait for a completely clean toothpick, as this can indicate overbaking.
Step 11: Add Optional Flaky Salt
Sprinkle the warm brownies lightly with flaky salt, if desired.
The salt provides contrast to the rich chocolate and sweet batter.
Step 12: Cool Completely
Place the pan on a wire rack.
Allow the brownies to cool completely inside the pan.
For especially neat cuts, refrigerate the cooled tray briefly before slicing.
Step 13: Slice the Brownies
Use the parchment overhang to lift the brownies from the pan.
Place them on a cutting board.
Cut into 16 squares or 9 larger portions with a large, sharp knife.
Wipe the knife clean between cuts.
Tips for Fudgy Brownies
Measure the Flour Accurately
Too much flour creates a dry or cakey texture. Use a kitchen scale when possible.
Whisk the Eggs Thoroughly
Whisking the eggs and sugar helps develop the glossy, crackly surface.
Sift the Cocoa
Cocoa powder forms stubborn lumps that can remain visible in the baked brownies.
Avoid Overmixing
Fold the flour only until no dry patches remain.
Use a Metal Pan
A light-coloured metal pan provides more predictable baking than glass or dark metal.
Do Not Overbake
The brownies continue setting while they cool. Remove them when the toothpick still carries moist crumbs.
Cool Before Cutting
Warm fudgy brownies are very soft and may collapse or stick to the knife.
How to Get a Shiny, Crackly Top
The thin, shiny crust develops when sugar dissolves into the egg mixture and rises to the surface during baking.
For the best chance of achieving it:
- Use granulated sugar in the batter.
- Add the sugar while the melted butter is still warm.
- Whisk the eggs thoroughly.
- Avoid reducing the sugar substantially.
- Use room-temperature eggs.
- Bake the batter promptly after mixing.
- Avoid disturbing the pan during baking.
The surface may vary slightly depending on the sugar, eggs and mixing method.
How to Know When Brownies Are Done
Insert a toothpick approximately two inches from the edge of the pan.
For fudgy brownies, it should emerge with several moist crumbs but no wet batter.
Testing directly through a melted chocolate piece can give a misleading result, so check another area if necessary.
The centre should look set but remain soft. It should not move like liquid when the pan is shaken gently.
Why Are My Brownies Cakey?
Common causes include:
- Too much flour.
- Excessive mixing after adding flour.
- Overbaking.
- Adding extra eggs.
- Using a larger pan and creating a thin layer.
- Incorrect ingredient substitutions.
- Adding a raising agent.
Measure carefully and fold the dry ingredients gently.
Why Are My Brownies Dry?
Dry brownies may result from:
- Baking for too long.
- An oven that runs hot.
- Too much flour or cocoa.
- Using a dark metal pan.
- Cutting the portions before they cool.
- Substituting lower-fat ingredients.
- Storing the brownies uncovered.
Begin checking the tray before the full estimated baking time.
Why Did My Brownies Sink?
A slight dip is normal as dense brownies cool.
Significant sinking may result from:
- Underbaking.
- Excessive whisking after adding flour.
- Removing the pan before the centre sets.
- Incorrect egg or flour quantities.
- Opening the oven repeatedly.
- An inaccurate oven temperature.
Allow the brownies to cool completely before judging their final texture.
Easy Brownie Variations
Walnut Brownies
Fold toasted chopped walnuts into the batter.
Pecan Brownies
Add toasted pecans and finish the top with flaky salt.
Triple-Chocolate Brownies
Use a mixture of semisweet, milk and white chocolate pieces.
Peppermint Brownies
Add a carefully measured amount of peppermint extract and decorate with crushed candy canes after baking.
Salted Caramel Brownies
Swirl thick caramel sauce into the batter and finish with flaky salt. Test the quantity because excess sauce can affect baking.
Peanut Butter Brownies
Spoon small portions of creamy peanut butter over the batter and create gentle swirls with a knife.
Cheesecake Brownies
Add a separately prepared and tested cream-cheese layer before baking.
Raspberry Brownies
Fold freeze-dried raspberries into the batter or serve the baked brownies with fresh berries.
What to Serve With Chocolate Brownies
Serve the brownies with:
- Vanilla ice cream.
- Whipped cream.
- Fresh strawberries.
- Fresh raspberries.
- Warm chocolate sauce.
- Salted caramel sauce.
- Powdered sugar.
- Hot coffee.
- Cold milk.
- Peppermint hot chocolate.
For a celebration dessert, warm an individual brownie and top it with vanilla ice cream, chocolate sauce and chopped toasted nuts.
Can You Make Brownies Ahead?
Yes.
Bake the brownies one or two days before serving.
Allow them to cool completely and store the uncut tray in an airtight container.
Cutting shortly before serving helps prevent the exposed edges from drying.
How to Store Chocolate Brownies
Store completely cooled brownies in an airtight container at room temperature for up to four days.
Place parchment paper between layers.
For longer storage, refrigerate them for up to one week. Allow chilled brownies to return to room temperature before serving for a softer texture.
Can You Freeze Brownies?
Yes.
Freeze the Complete Tray
Allow the uncut brownies to cool completely.
Wrap them tightly and place them in a freezer-safe container.
Freeze for up to three months.
Thaw before slicing.
Freeze Individual Brownies
Wrap each cooled portion or separate the layers with parchment.
Place them in a freezer-safe container and freeze for up to three months.
Thaw at room temperature before serving.
How to Reheat Brownies
Place an individual brownie on a microwave-safe plate.
Heat it briefly until slightly warm and the chocolate begins to soften.
Alternatively, wrap several brownies loosely in aluminium foil and warm them in a 300°F oven.
Avoid overheating because the edges can become hard.
How to Package Brownies as Gifts
Cool and slice the brownies completely.
Place each square inside a paper case or wrap it in parchment.
Arrange the portions inside:
- Bakery boxes.
- Christmas cookie tins.
- Cellophane treat bags.
- Divided dessert boxes.
- Homemade gift baskets.
Include an ingredient and allergen label when giving homemade food to others.
Frequently Asked Questions
Can I use salted butter?
Yes. Reduce or omit the added salt according to the butter’s salt content.
Can I use chocolate chips instead of chopped chocolate?
Yes. Either option works, although chopped chocolate creates more irregular melted pockets.
Do brownies need baking powder?
No. This recipe is designed without a raising agent to maintain a dense, fudgy texture.
Why did my brownies stick to the pan?
Line the pan with parchment paper and leave an overhang for easy removal.
Can I double the recipe?
Yes, but use an appropriately sized pan and test the adjusted baking time. Do not simply crowd double the batter into the original pan.
Can I bake the brownies in a 9 × 13-inch pan?
The layer will be too thin unless the ingredient quantities are adjusted. Use a tested scaled recipe.
Should brownies be refrigerated?
Refrigeration is unnecessary for short-term storage, but it can extend their usable life. Chilled brownies have a firmer texture.
Can I cut warm brownies?
You can, but the portions will be soft and untidy. Cool them completely for clean slices.
How many brownies does the recipe make?
The recipe produces 16 standard brownies or 9 large portions.
Fudgy Chocolate Brownies Recipe Card
Preparation time: 15 minutes
Cooking time: 24–30 minutes
Cooling time: Approximately 1 hour
Total time: Approximately 1 hour 45 minutes
Yield: 16 brownies
Course: Dessert
Cuisine: American
Method: Baking
Ingredients
- ¾ cup unsalted butter, melted.
- 1¼ cups granulated sugar.
- ½ cup packed light brown sugar.
- 3 large eggs.
- 2 teaspoons vanilla extract.
- ¾ cup unsweetened cocoa powder.
- ¾ cup all-purpose flour.
- ½ teaspoon salt.
- 1 cup semisweet chocolate chips or chopped chocolate.
- 1 teaspoon instant espresso powder, optional.
- Flaky salt, optional.
Instructions
- Preheat the oven to 350°F.
- Grease and line a 9-inch square metal baking pan.
- Melt the butter in a large heatproof bowl.
- Whisk in the granulated and brown sugars.
- Add the eggs one at a time.
- Whisk until the mixture becomes thick and glossy.
- Add the vanilla and optional espresso powder.
- Sift in the cocoa powder.
- Add the salt and fold until combined.
- Sift in the flour.
- Fold until only a few pale streaks remain.
- Reserve some chocolate for the top.
- Fold the remaining chocolate into the batter.
- Spread the batter evenly in the prepared pan.
- Scatter the reserved chocolate over the surface.
- Bake for 24–30 minutes.
- Remove when a toothpick carries moist crumbs but no wet batter.
- Add optional flaky salt.
- Cool completely in the pan.
- Lift out using the parchment overhang.
- Cut into 16 squares.
Recipe Notes
- Measure the flour and cocoa accurately.
- Add the sugar while the butter remains warm.
- Whisk the eggs thoroughly.
- Avoid overmixing after adding the flour.
- Do not wait for a completely clean toothpick.
- Cool the brownies fully before slicing.
- Test the complete recipe before confirming the exact baking time and yield.